
In early July, Seeed Studio launched the Seeed Fusion DIY XIAO Mechanical Keyboard Contest. The goal of the contest was to enable people to design and assemble their own mechanical keyboards using Seeed Studio’s PCB manufacturing and assembly services. Contestants were also encouraged to use Seeed’s XIAO boards (SAMD21, RP2040, nRF52840, and ESP32C3) in their designs. I immediately started gathering information about mechanical keyboards and evaluating the right microcontroller for my design. I decided to create a simple macro pad with a few keys instead of a full keyboard.
The design features a PCB using the XIAO RP2040, based on Raspberry Pi’s microcontroller. The circuit has nine MX keys arranged in a 3×3 matrix, which saves IO pins for additional functions. The design also includes a rotary encoder for volume control or zoom. Each key is backlit with a WS2812 RGB LED. Considering the various switch types available, I opted to use hot-swap sockets instead of soldering the switches directly to the board. I also added Truchet tiles designs to the board.
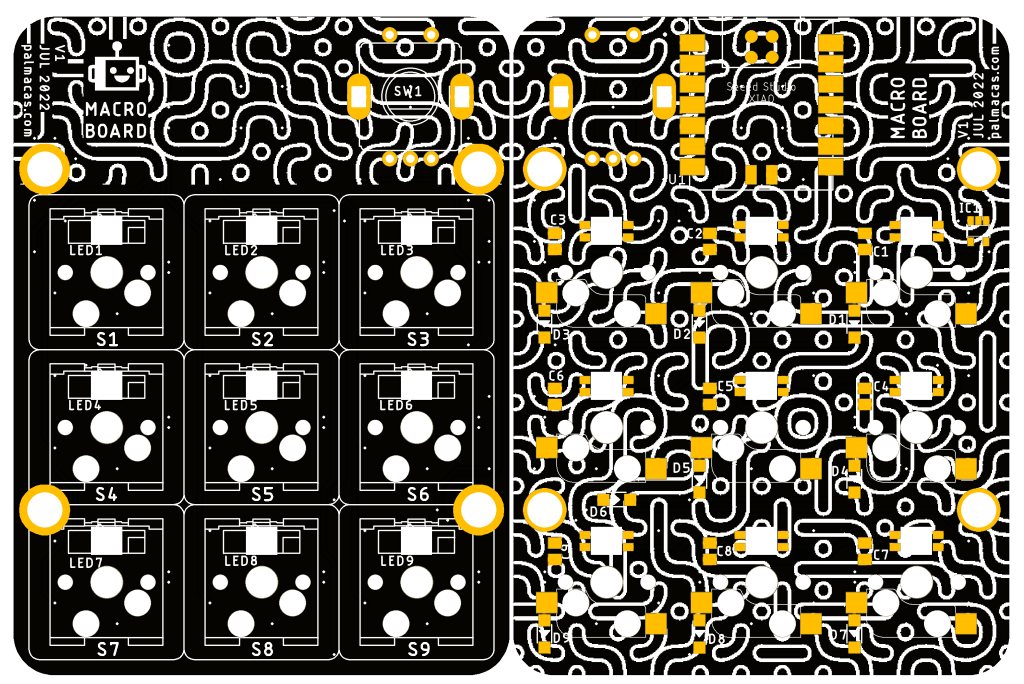
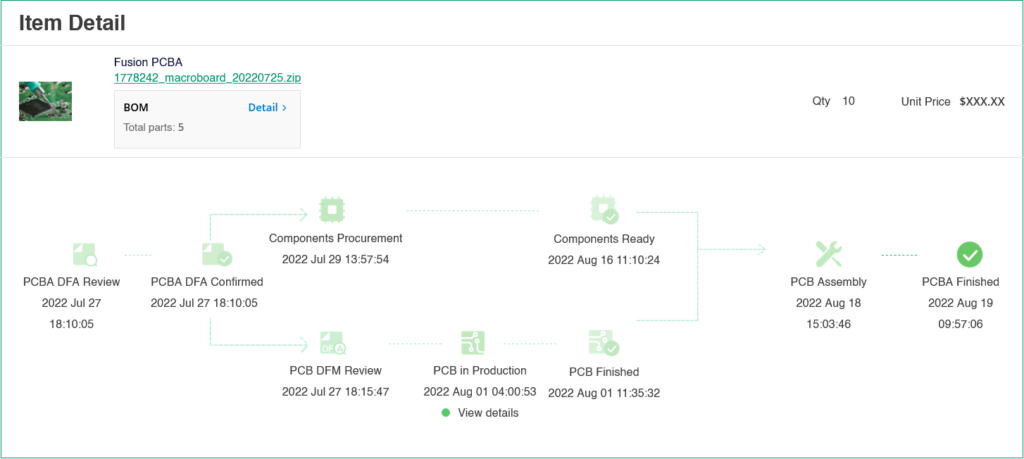
The instructions of the contest mention that I should generate the Gerber files for manufacturing, also other assembly files with the position of the components and the BOM to assemble the board. Once I generated all the files I uploaded everything on the Seeed Studio Fusion webpage; when I got the confirmation that the files were reviewed I sent an email to Seeed Studio’s support to let them know about the order. Then Seeed Studio’s support sent me a discount coupon for the whole price of the PCBs and the assembly, so the PCBs and the assembly would be free of charge. For the PCB assembly, Seeed Studio recommend using the parts from the Open Parts Library as these parts could be sourced in short time, improving the assembly times. Particularly, on my design I used the SK6812 MINI-E LEDs for reverse mounting, but the LEDs aren’t on the Open Parts Library. So, with the part number and reference PDF, the people from Seeed Studio found and added the parts to the assembly.
While waiting for the PCBs to arrive, I ordered the other components and worked on the case design. The switches, keycaps and hot-swap sockets were difficult to get on small quantities. I leave some links that may be useful if someone wants the get the parts.
I used Eagle to export a 3D model of the circuit to Fusion 360, then designed a case using the PCB as a starting point. The case has a base for the PCB, with holes for XIAO’s USB-C port and RESET and BOOT buttons. The cover protects the internals from dust and has holes for the switches. The case was 3D printed using resin for a better resolution and finish, and the option to make transparent cases to show the circuit and the RGB LEDs.


The PCBs, switches, and printed parts arrived on time, and I was impressed with the quality and detail of the assembled PCBs. After soldering the hot-swap switches and encoder, I tested the keyboard. I connected the XIAO RP2040 to a computer and used a basic MicroPython program to turn on the LEDs and detect key presses.


After confirming that the circuit was working properly, I fixed it to the 3D printed base, being careful not to break the resin while screwing. I then placed the cover and pressed the switches into place, making sure the pins made contact with the hot-swap switches. The base and cover are held together by pressure and switch connections, but glue can be added for additional security. The next step was to write the final program for the XIAO RP2040 and set up the function of each key.
The project files, including the schematic, 3D models, and firmware, can be found on the GitHub repository.
GitHub: MacroBoard
For more information:
Seeed Fusion DIY XIAO Mechanical Keyboard Contest
Seeed Studio XIAO Series
Seeed XIAO RP2040
Seeed Studio XIAO RP2040 – Wiki
If you have any questions, feel free to ask.
📢 This post is an entry for the Seeed Fusion DIY XIAO Mechanical Keyboard Contest and is partially sponsored by Seeed Studio.
Pingback: MacroBoard – Configuration – palmacas